
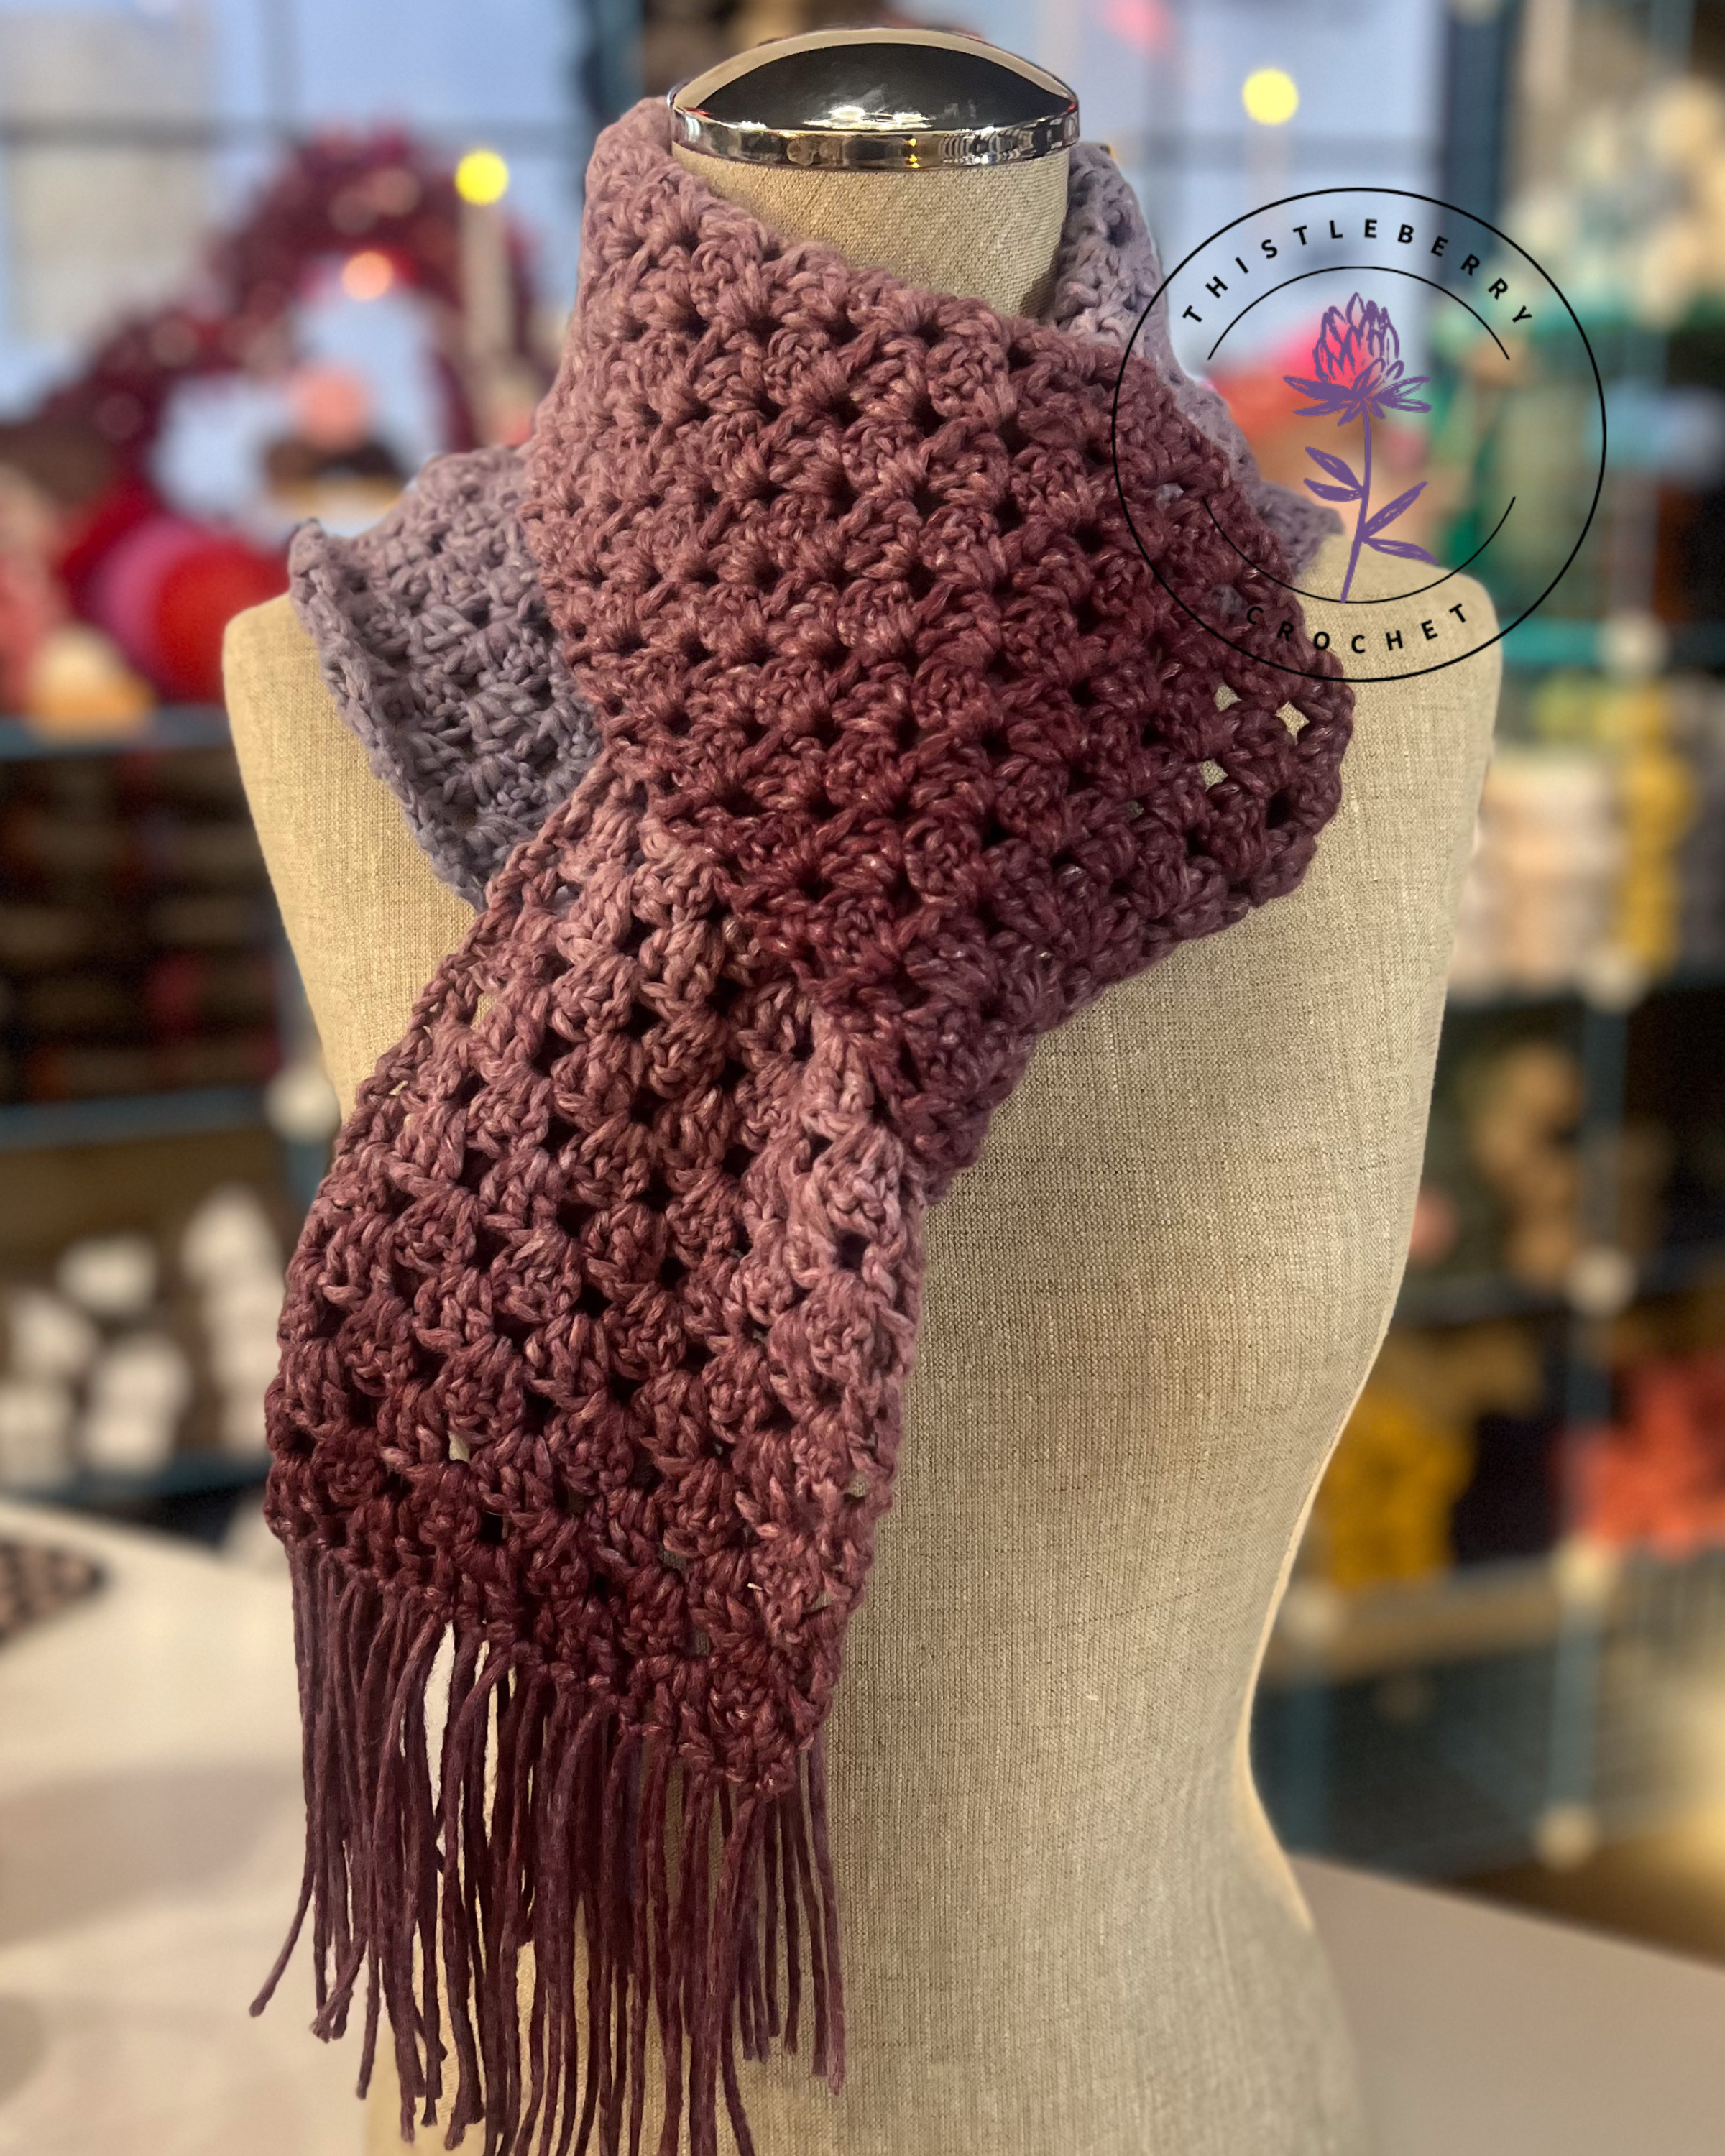
Dreamcatcher Scarf
Skill Level: Beginner
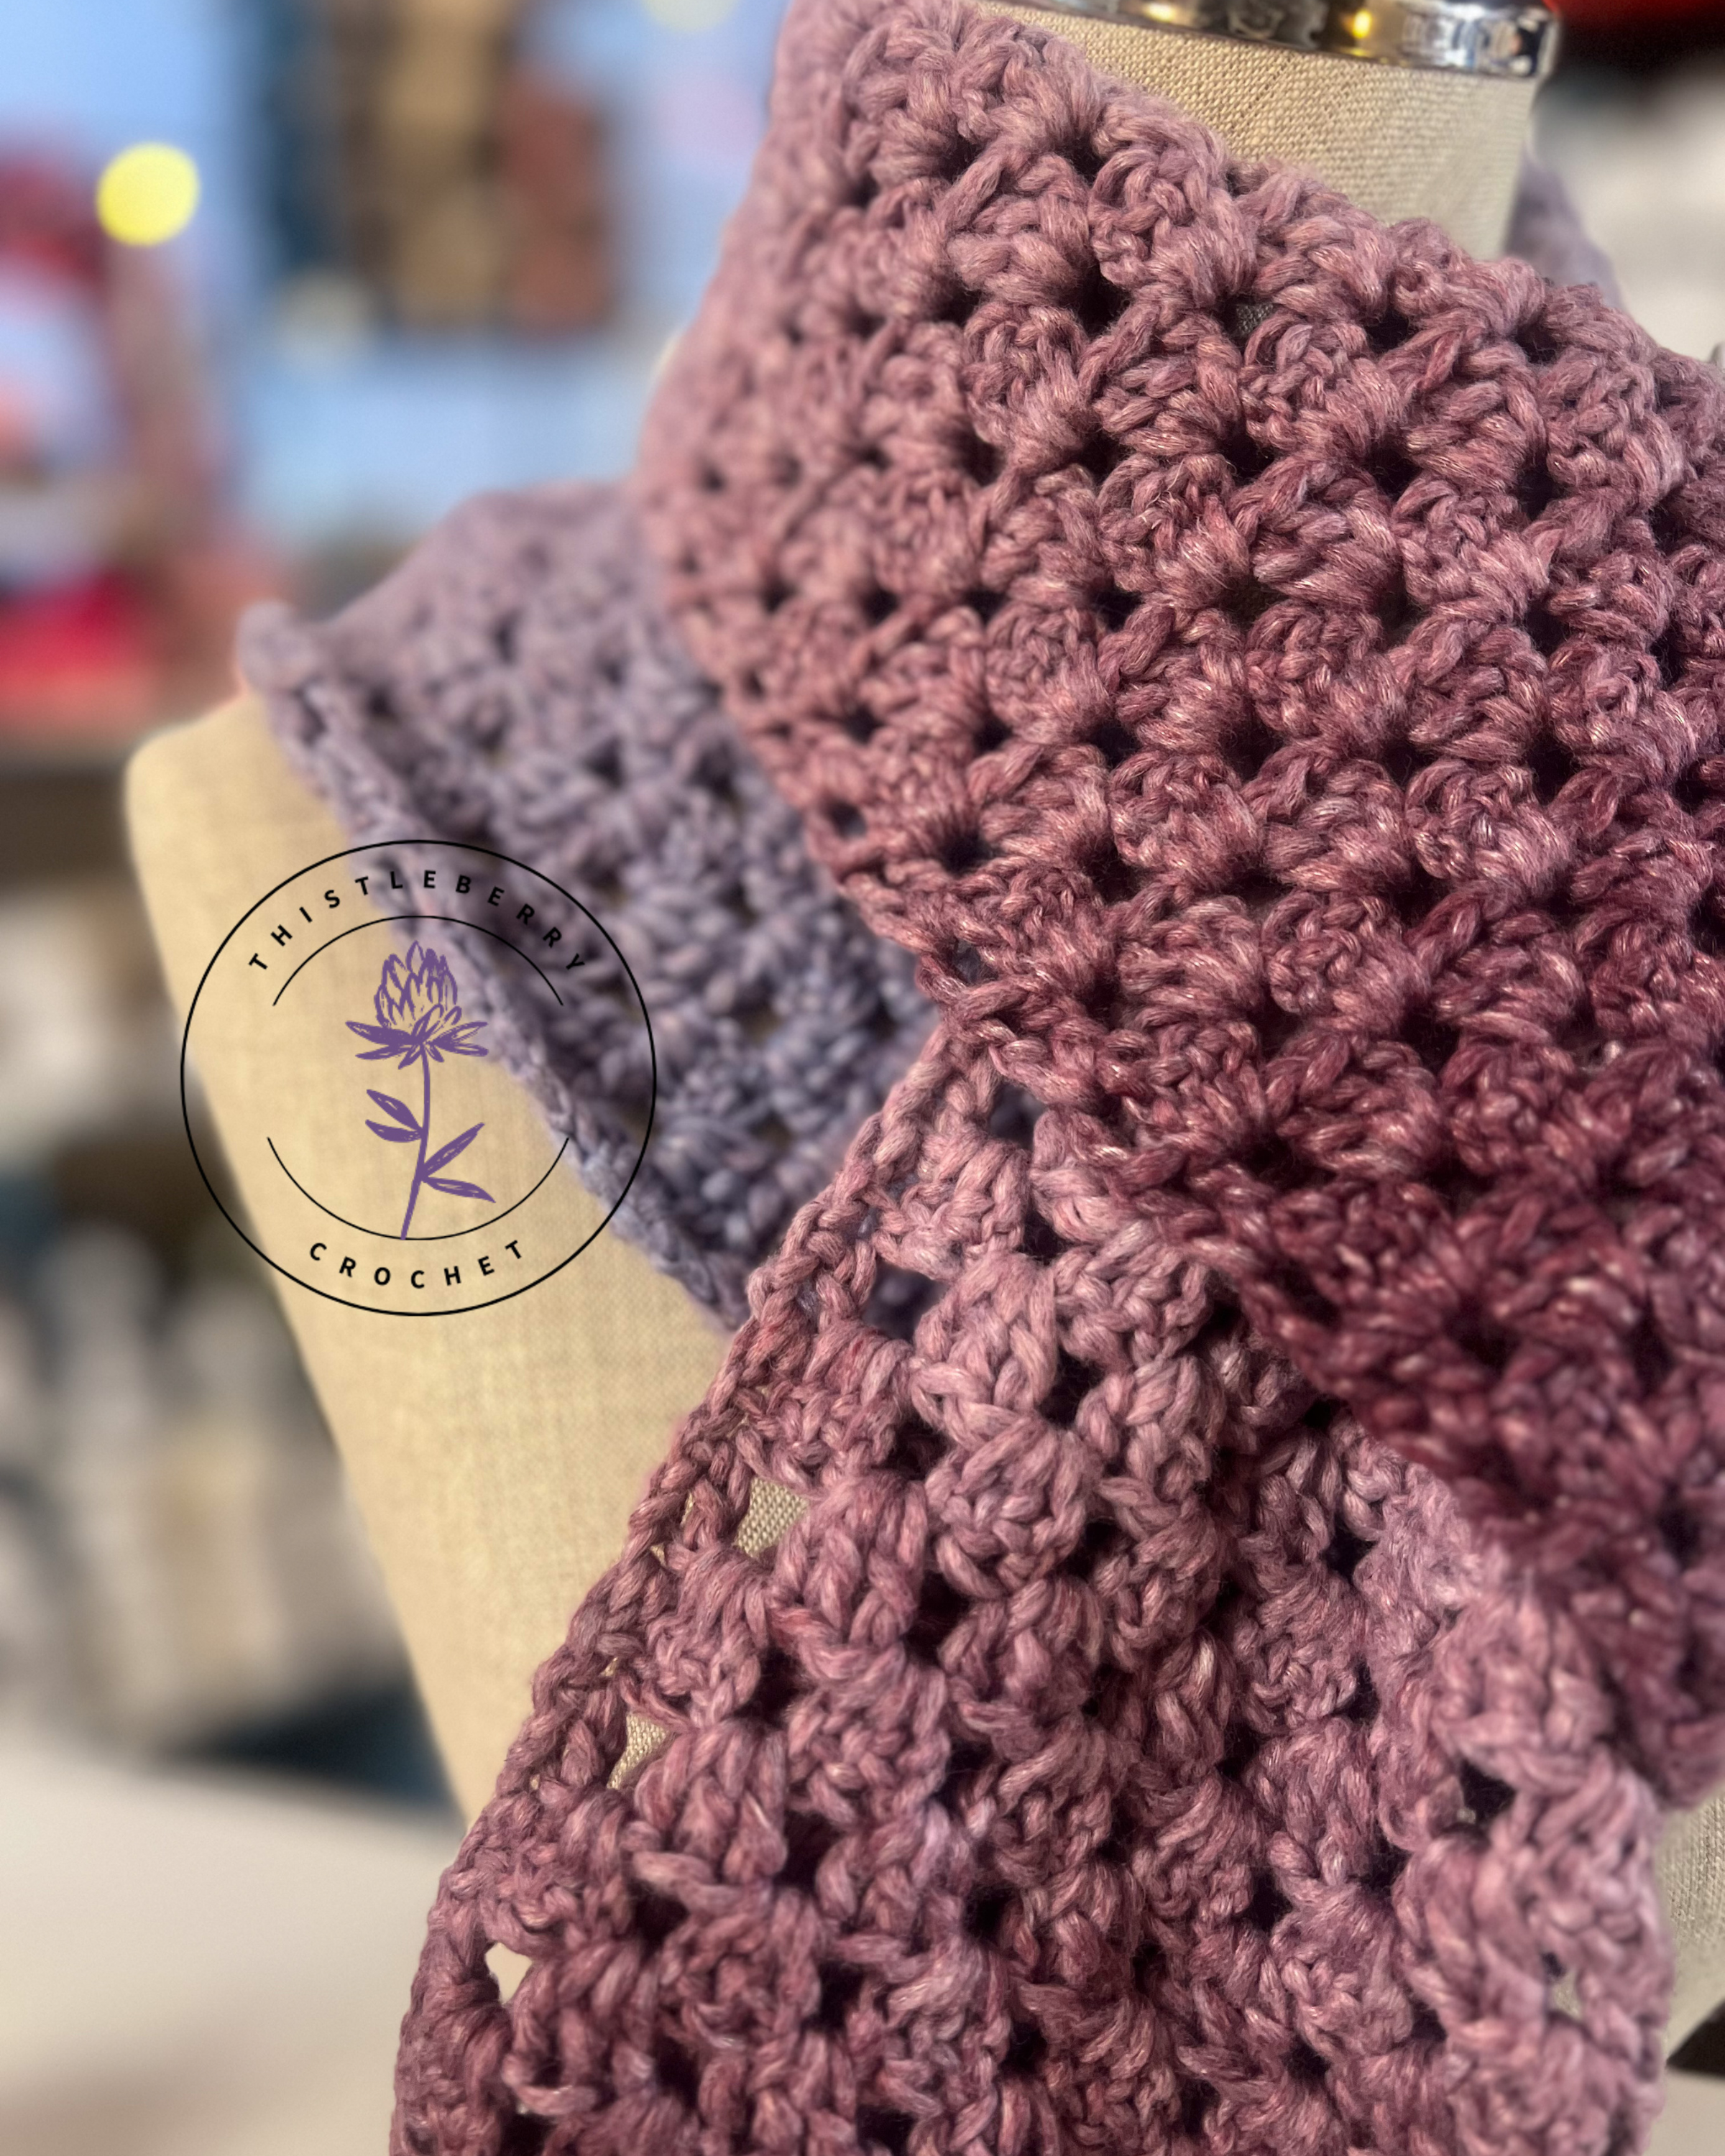
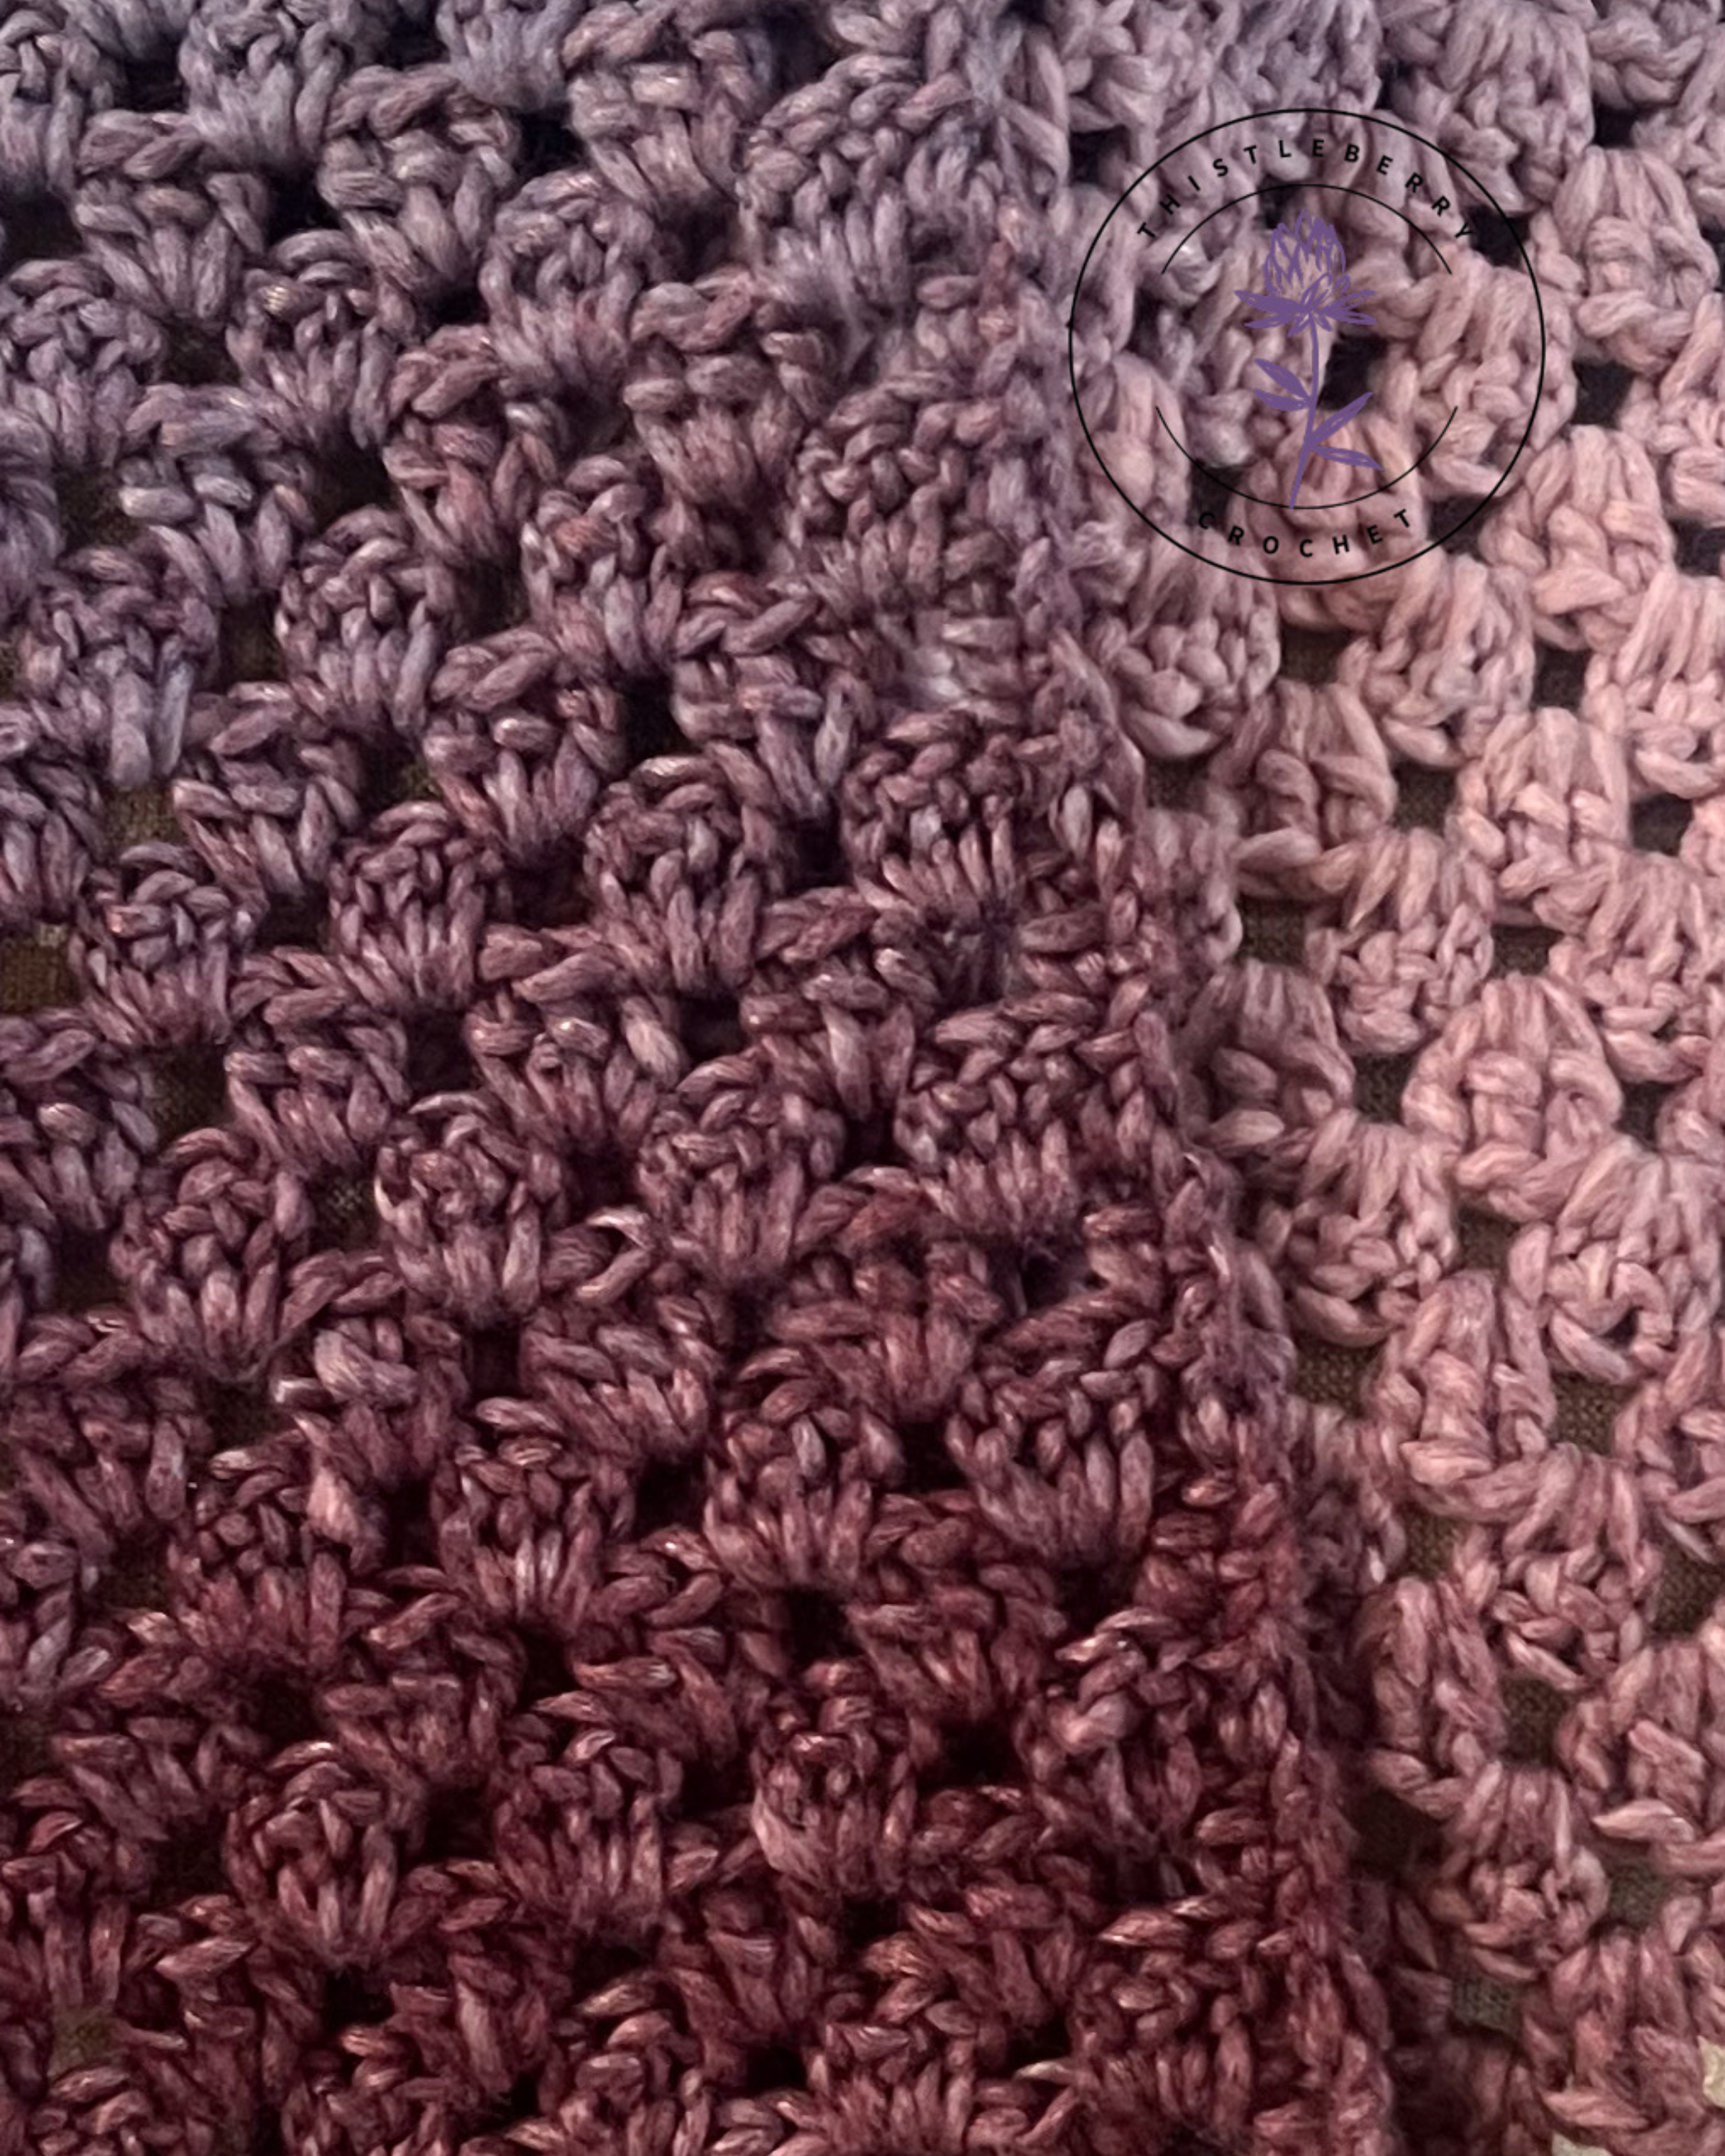
Granny stitches aren’t just for squares! This scarf is really fun (and pretty quick) to work up, and with an easy two-row-repeat, it’s a great beginner scarf project.
Add a bit of extra sass with as much (or little) fringe as you’d like - instructions for adding fringe are included at the end of the tutorial video for this pattern.
I hope you have a blast creating this scarf!
Also, a quick thank you to Knit Cozy Yarn Shop for allowing me to take some photos of this scarf in their beautiful space! You can check out Knit Cozy’s beautiful products and amazing upcoming classes here!
KEEP SCROLLING FOR A LINK TO THE YOUTUBE VIDEO TUTORIAL FOR THIS PATTERN.
A downloadable PDF of this pattern is also available on my Etsy shop, HERE
Pattern Skills:
Here are the only skills you’ll need to complete this pattern:
Chain
Double Crochet
Supply List:
Yarn:
2 balls of Landscapes Renewed by Lion Brand (pictured in the color Dreamcatcher)
or approximately 378 yards of any other medium / 4 weight yarn that you love!
Dimensions and Gauge:
Finished Scarf Dimensions: 67.5” x 6”
Gauge: 7 rows and 4 dc clusters = 4”
The Pattern!
Below you’ll find the written instructions for my Dreamcatcher Before you begin, you should know that if you’d like to adjust the width of your scarf, you can do so by adding or removing chains from our foundation chain. Just make sure your chain is a multiple of 3 + 2. To adjust the length of your scarf, just work as many (or as few) rows as you’d like until it’s the desired length.
Pattern Abbreviations:
ch = chain
dc(s) = double crochet(s)
st(s) = stitch(es)
gap space = space between clusters of dc stitches
tch = turning chain
Chain 20 (18+2).
Row 1: Sc in 2nd ch from hook and in each ch across to end of row.
Row 2: Ch 3, turn. Dc in 1st st, *sk 2 sts, 3 dc in next st. Repeat from * across row until 3 sts remaining. Sk 2 sts, 2 dc in last st.
Row 3: Ch 3, turn (counts as dc). 3 dc in 1st gap space, and in each gap space across to end of row. End row with 1 dc in third (top) ch of tch 3.
Row 4: Ch 3 (counts as dc), turn. 1 dc in 1st st (same st as tch 3). 3 dc in each gap space across row until 1 gap space remains. Work 2 dc in last gap space.
Rows 5 - 121: Repeat rows 3 and 4, alternately.
Fasten off and weave in ends.
Optional: Add fringe however you’d like! I added mine by cutting 10" strands of yarn, folding them in half and pulling them through each stitch on the top and bottom of my scarf, using a smaller crochet hook (see video tutorial for more details).
And that’s all there is to it!
I hope you love your beautiful granny stitch scarf!